How to Add Previous and Next Links to Your CMS in Framer
Learn How to Add Previous and Next Navigation Links to Your CMS Blog Pages in Framer.
Add ID to Your Articles
First, make sure each article in your CMS has a unique ID. For example, you can assign ID 1 to Article 1, ID 2 to Article 2, and so on.
Adding Collection Items
Within your Framer project, add two Collection items to your blog pages. These collection items will serve as placeholders for the "Previous" and "Next" links.
Configuring the "Previous" Collection
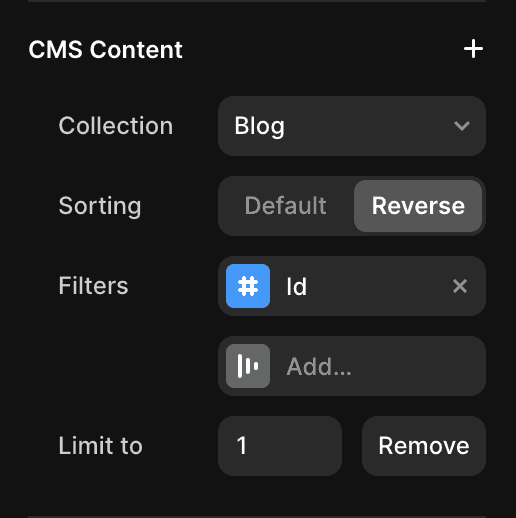
For the "Previous" collection item, you'll need to set up a filter. Here's how:
Add a filter for the ID field.
Set the condition to "Less than."
Specify the value as the current ID of the article.
Reverse the sorting order to ensure you get the previous article.
Add a limit of 1 to fetch only one result.
Configuring the "Next" Collection
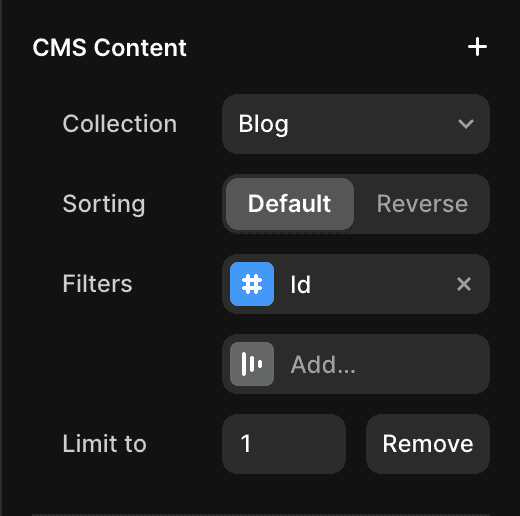
Now, let's configure the "Next" collection item:
Add a filter for the ID field.
Set the condition to "Greater than."
Specify the value as the current ID of the article.
Add a limit of 1 to fetch only one result.
And there you have it! You've successfully added "Previous" and "Next" links to your CMS blog pages in Framer.
Don't forget to share this post!


