How to Create a Video Scroll Progress Animation in Framer

Learn How to Create a Scroll Progress Animation for Your Videos in Framer.

Clément Lionne

2 min read

·

Sep 8, 2023

In this quick guide, you'll learn how to create a simple scroll progress animation for your videos using Framer.

Step 1: Setting Up Your Page

Begin by creating a new page and simply drag and drop your video onto it.

Step 2: Creating the Code Override File

Copy and paste the code below into a new code file called VideoScrollProgress in your project. Feel free to adjust the SCROLL_DISTANCE value to control the animation speed. Smaller values make it faster, while larger values make it slower.

import type { ComponentType } from "react"
import { useEffect } from "react"
import { useScroll, useTransform } from "framer-motion"
export function videoScrollProgress(Component): ComponentType {
    const SCROLL_START = 0 // Scroll position when animation starts
    const SCROLL_DISTANCE = 500 // Scroll distance after which animation ends
    const SCROLL_END = SCROLL_START + SCROLL_DISTANCE
    return (props) => {
        // useScroll() returns the current scroll position
        const { scrollY } = useScroll()
        // Calculate the scroll progress from 0 to 1
        const progress = useTransform(
            scrollY,
            [SCROLL_START, SCROLL_END],
            [0, 1]
        )
        // Pass the progress as a prop to the original component
        return 
    }
}

Step 3: Applying the Code Override

In your code override settings, add the VideoScrollProgress file and select the videoScrollProgress override.
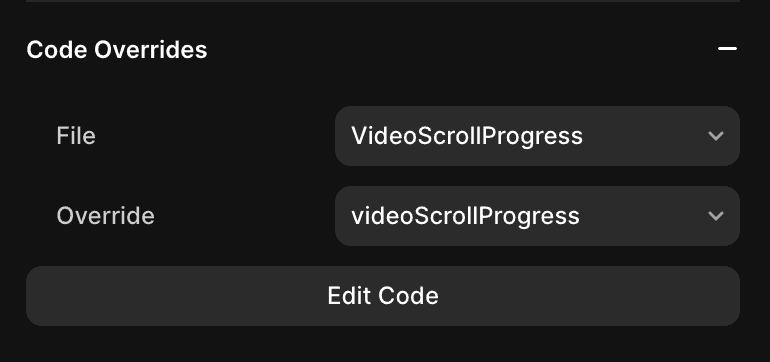
Apply the video scroll component

That's it! You've successfully added a scroll progress animation to your videos.
I created this animation with the help of the article named Advanced Scroll Effects in Framer by Giles Perry.

So, you have a project?
Let's take it to the next level.
So, you have a project?
Let's take it to the next level.
So, you have a project?
Let's take it to the next level.