In this tutorial, you'll learn how to implement a custom table of contents in Framer.
Implement the Table of Contents
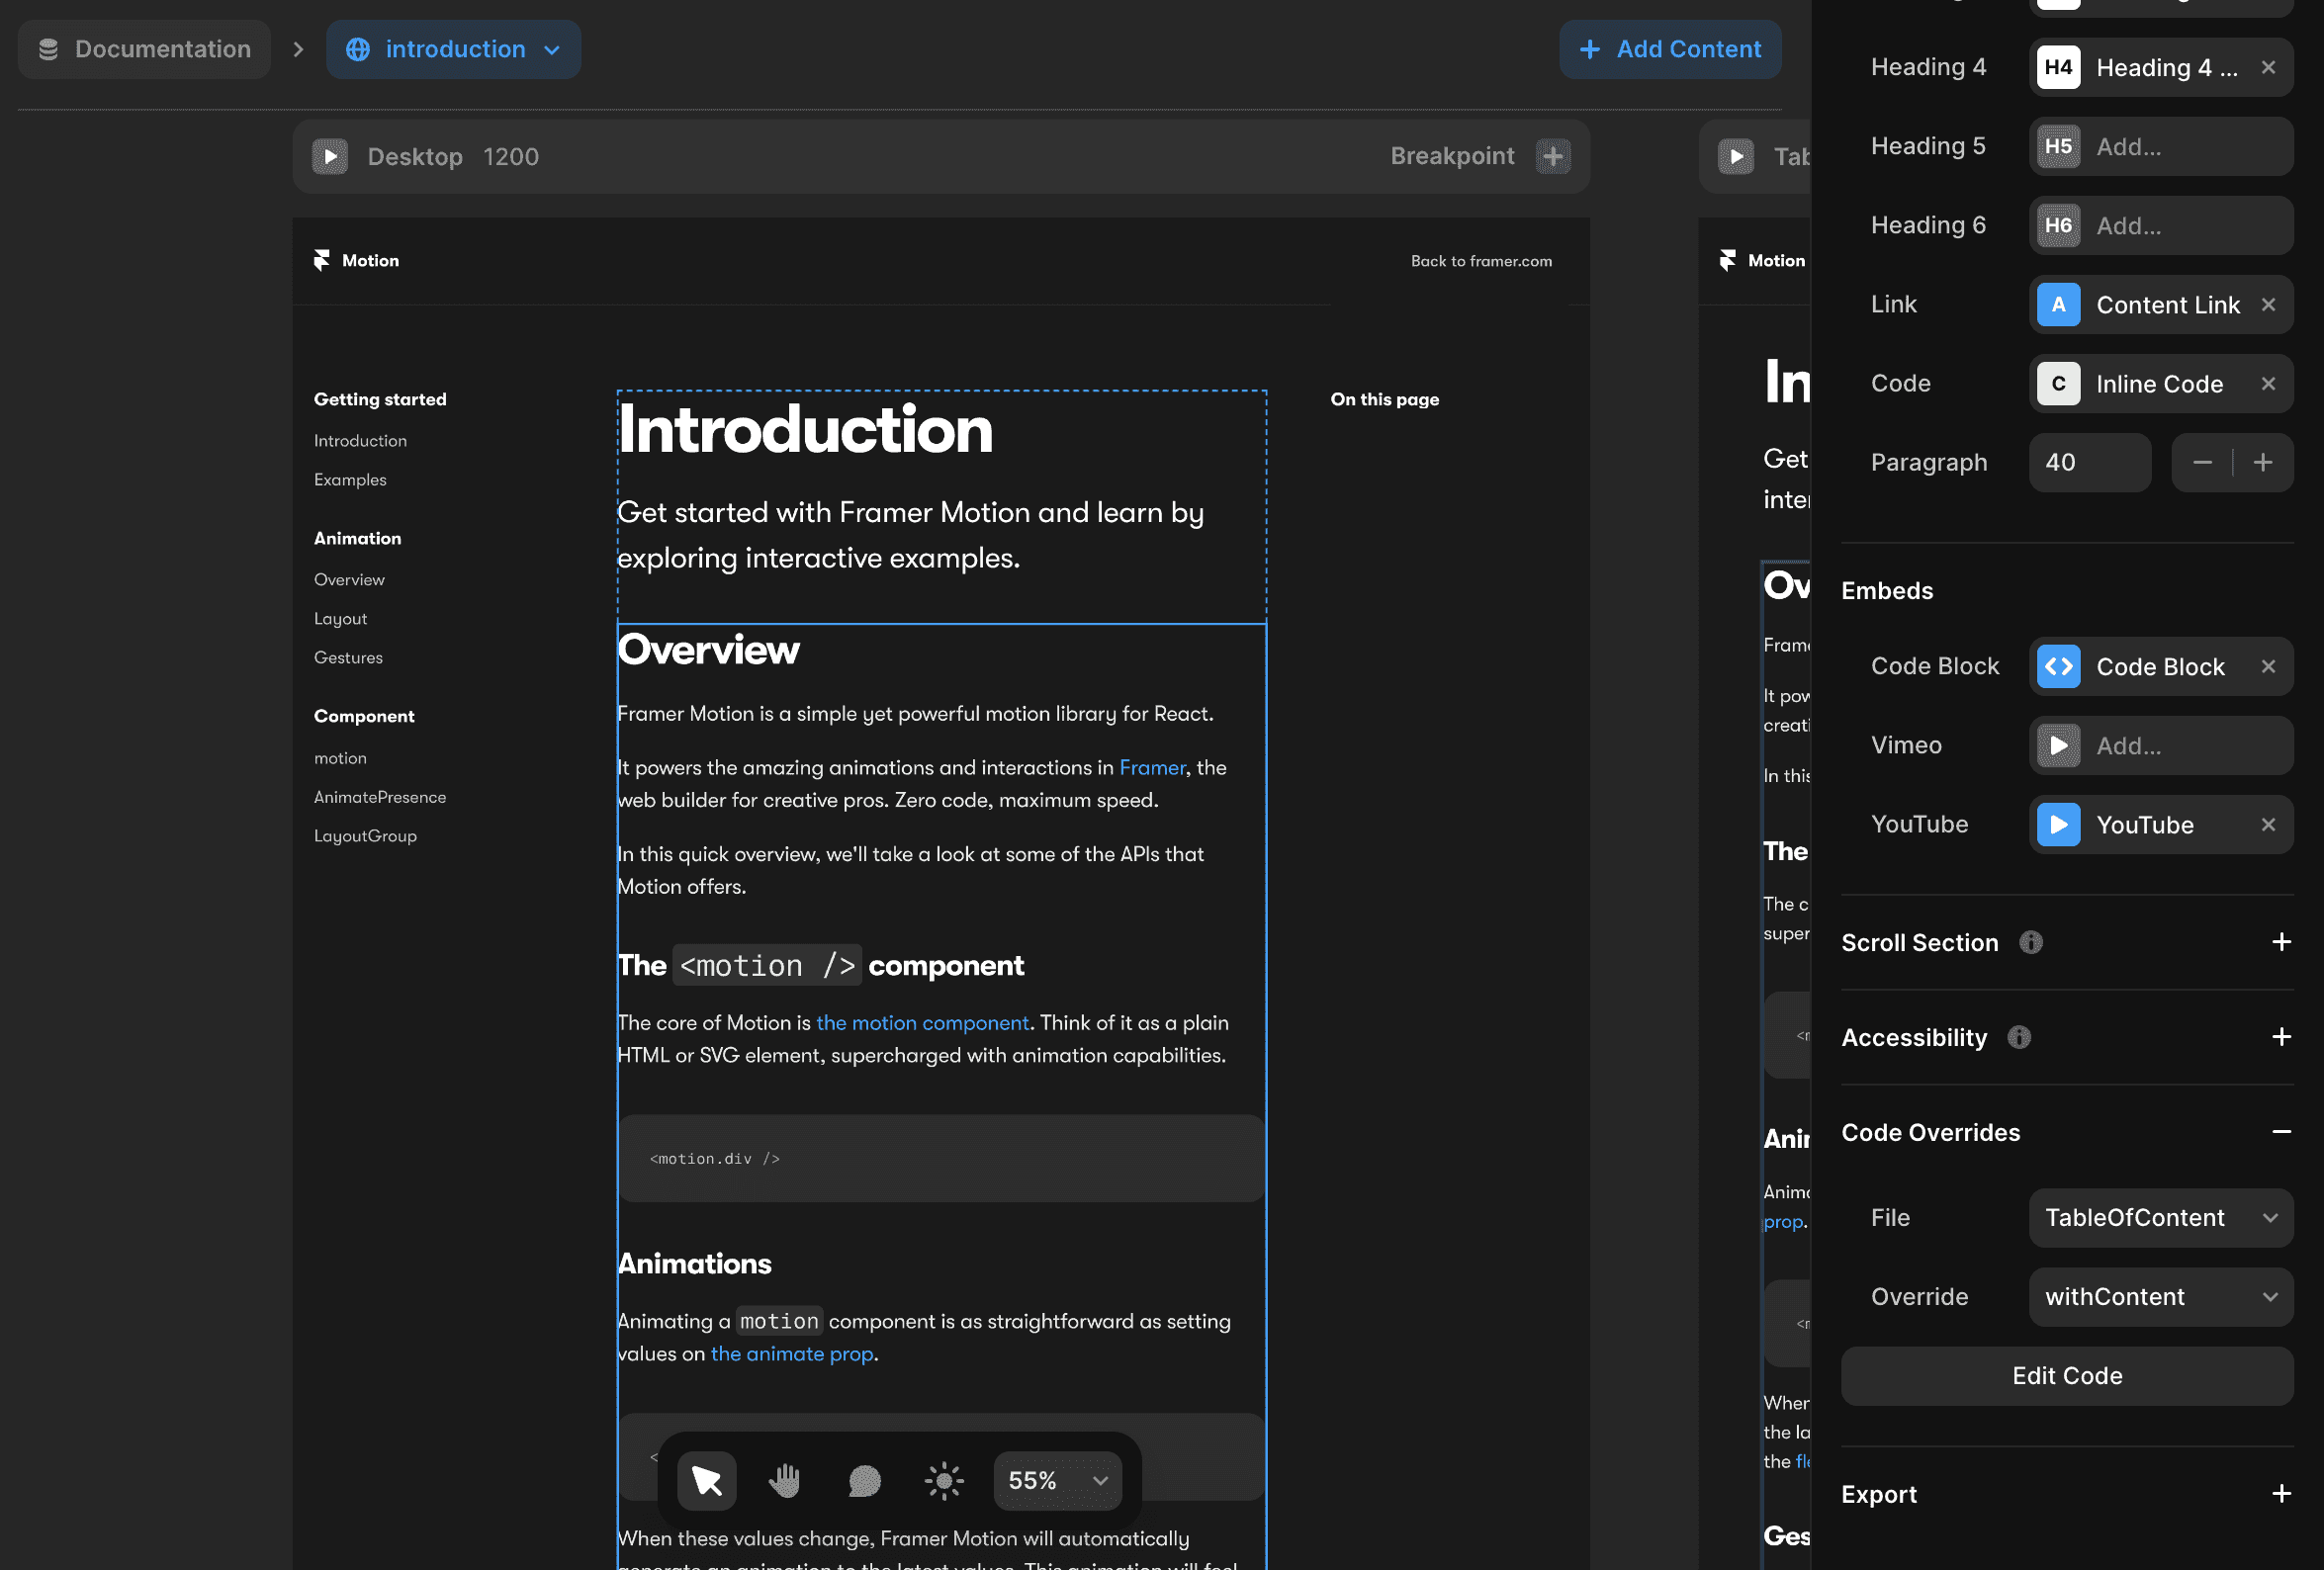
Select the content you want to include in the table of contents.
Add the code override file named
TableOfContentand the override function namedwithContent.
Create Component with Variants
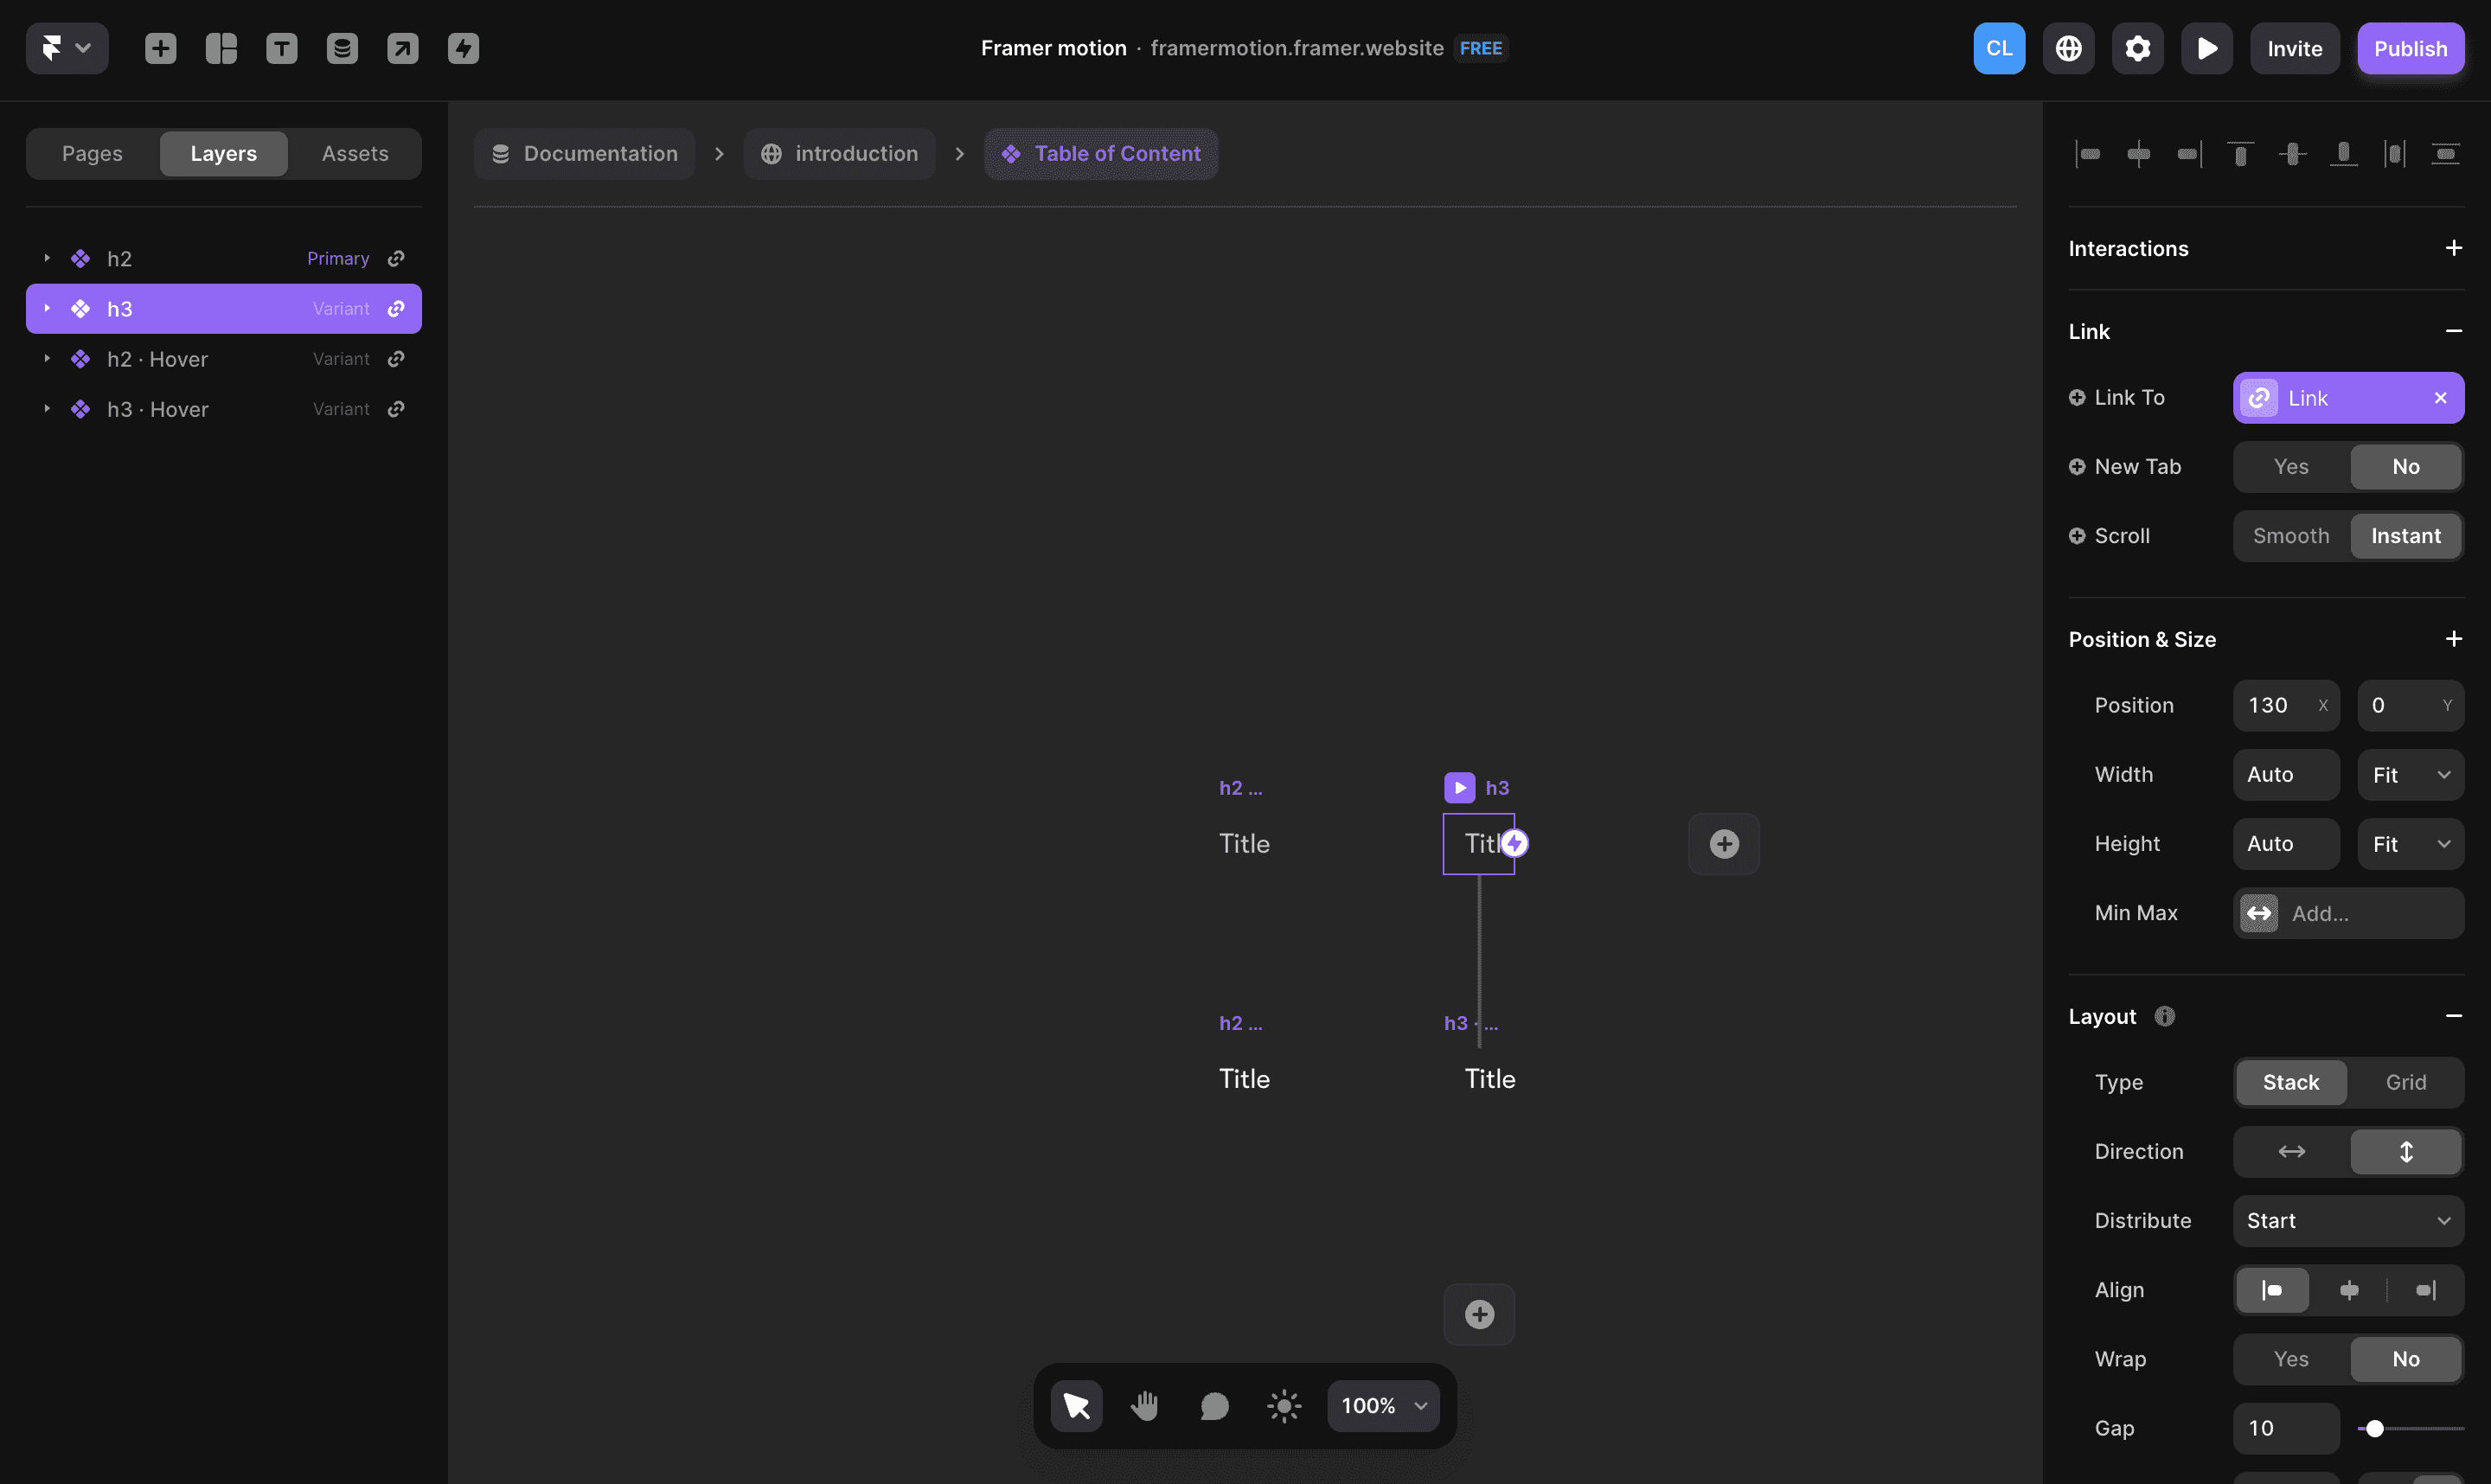
Create a component with six variants: h1, h2, h3, h4, h5, and h6.
Ensure the naming is lowercase (e.g., "h1," "h2").
Create a Link variable for links.
Create a Title variable for the content.
To use the component, you will have to select the component and add the code override file named TableOfContent and the override function named withTableOfContent.
Implement Design Changes
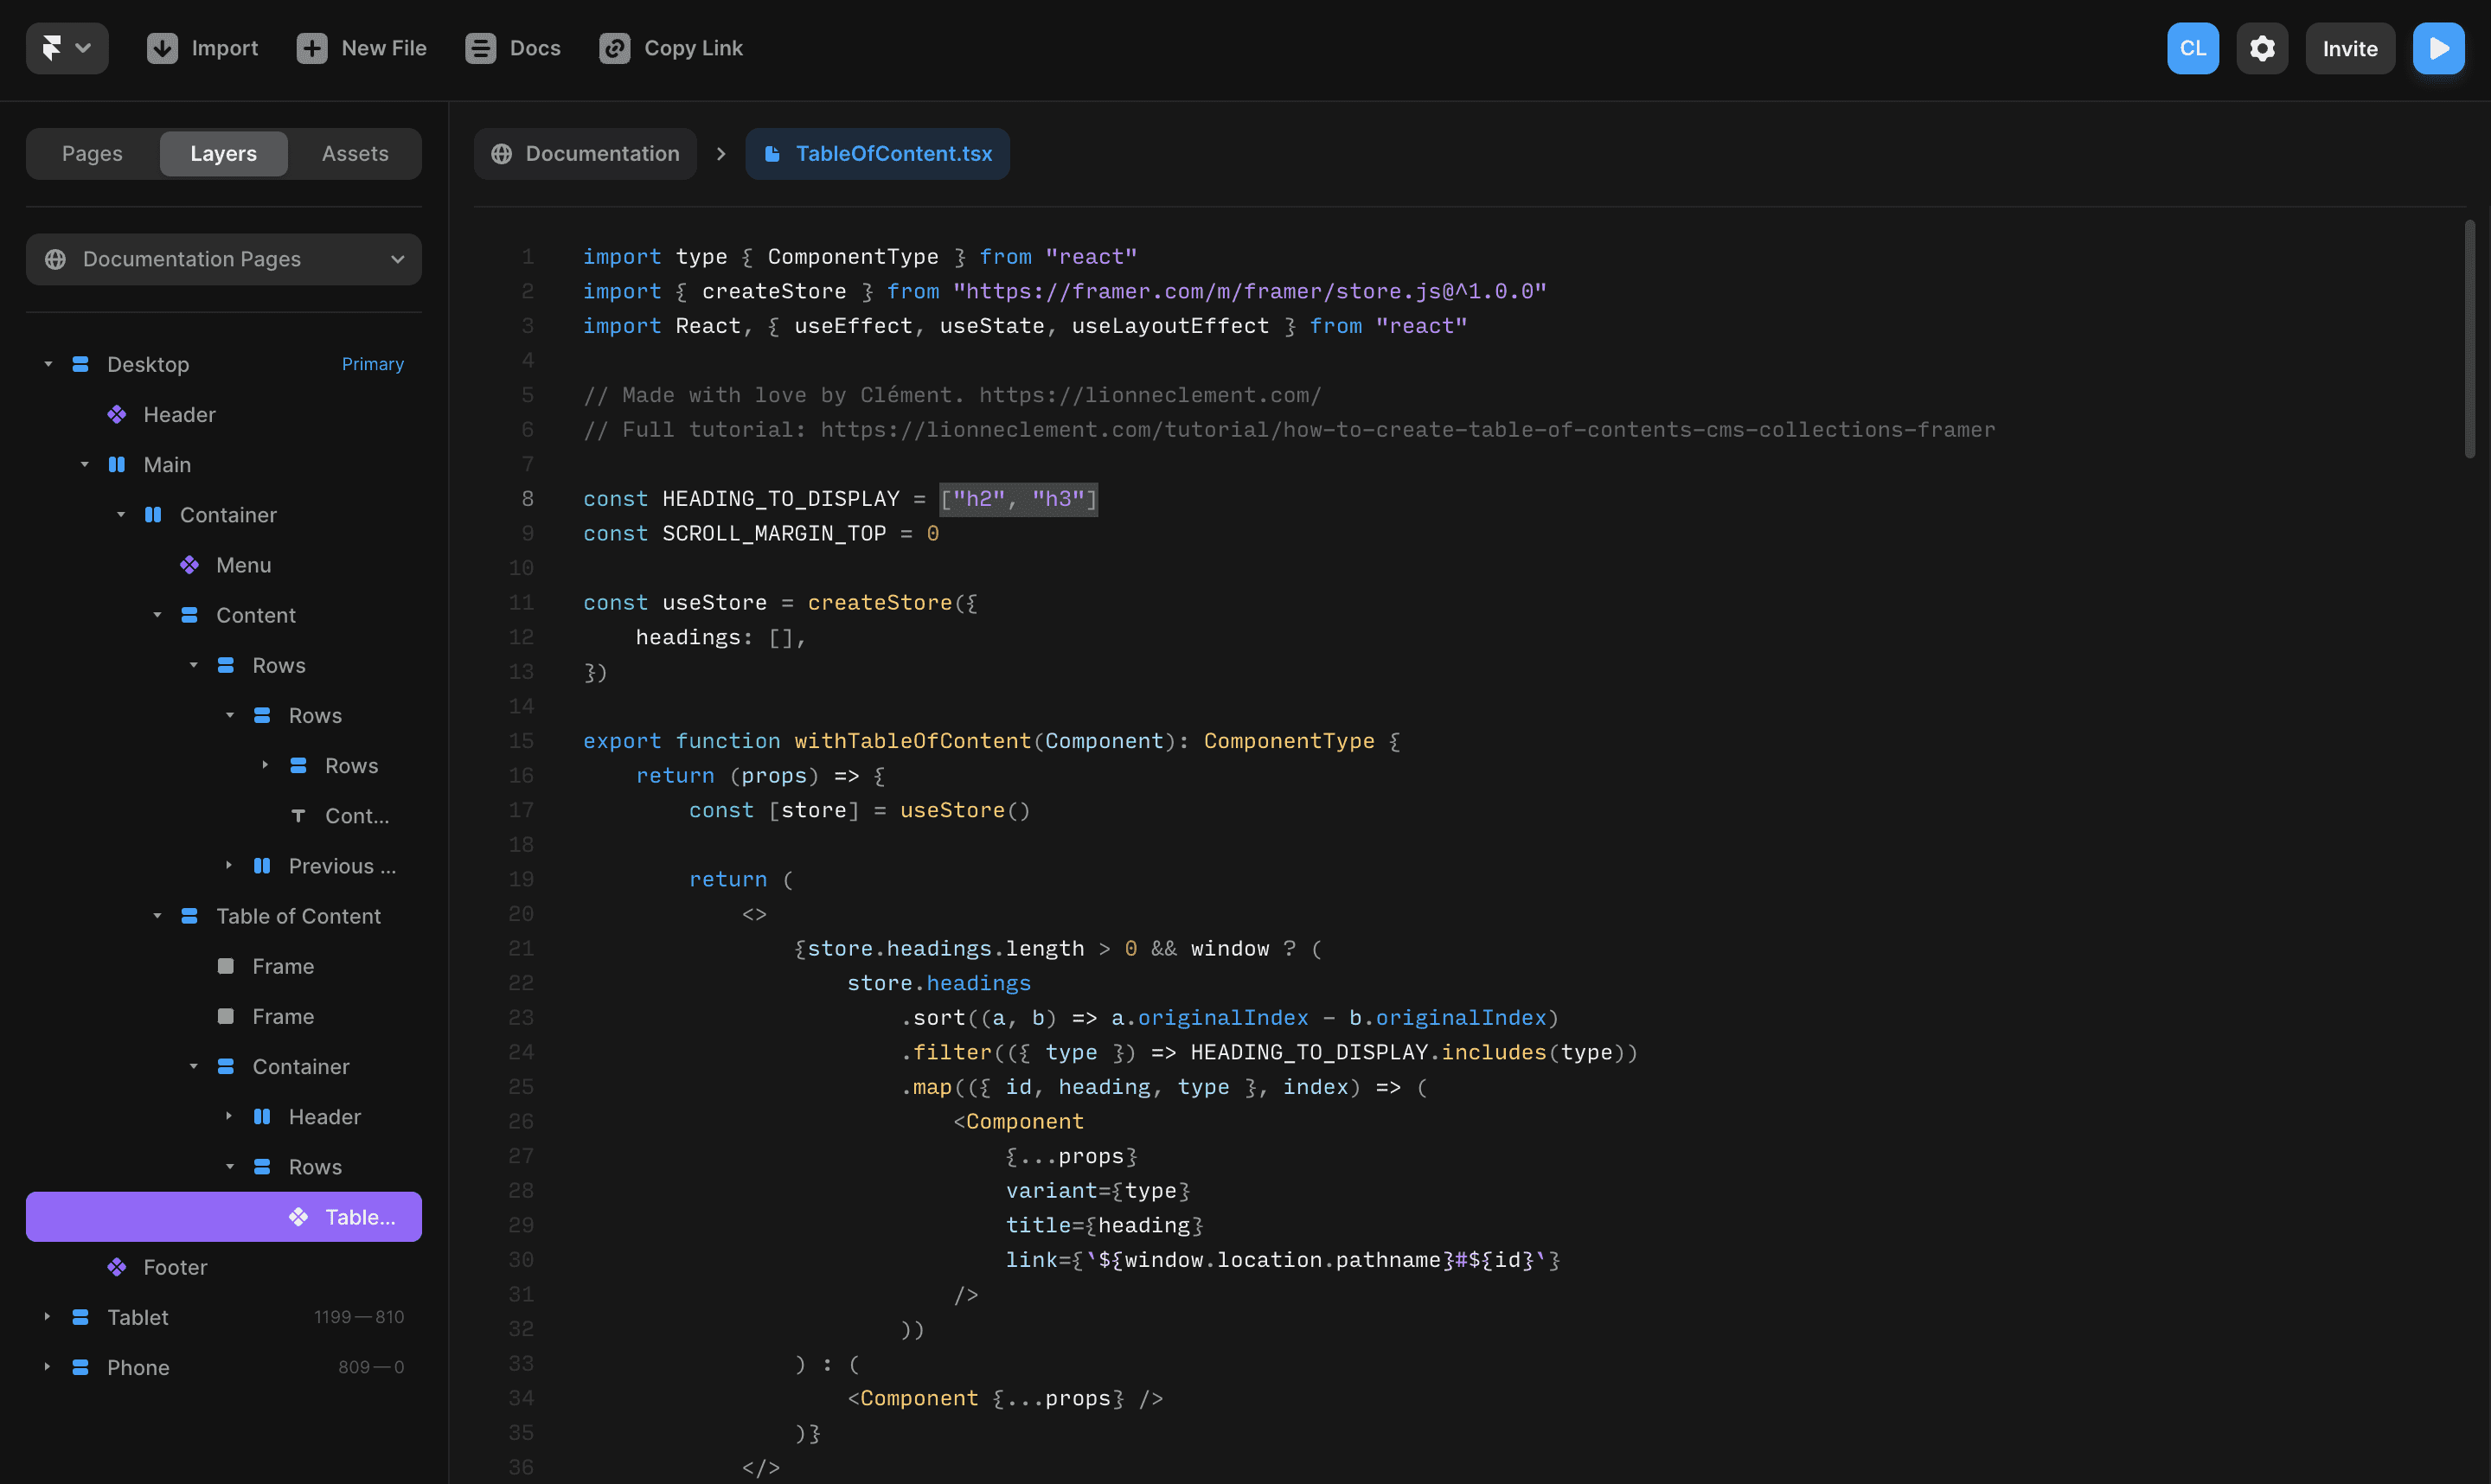
In my case, I only want to display the headings h1 and h2, so I will set the HEADING_TO_DISPLAY variable as const HEADING_TO_DISPLAY = ["h1", "h2"];.
Adjust the scroll margin top
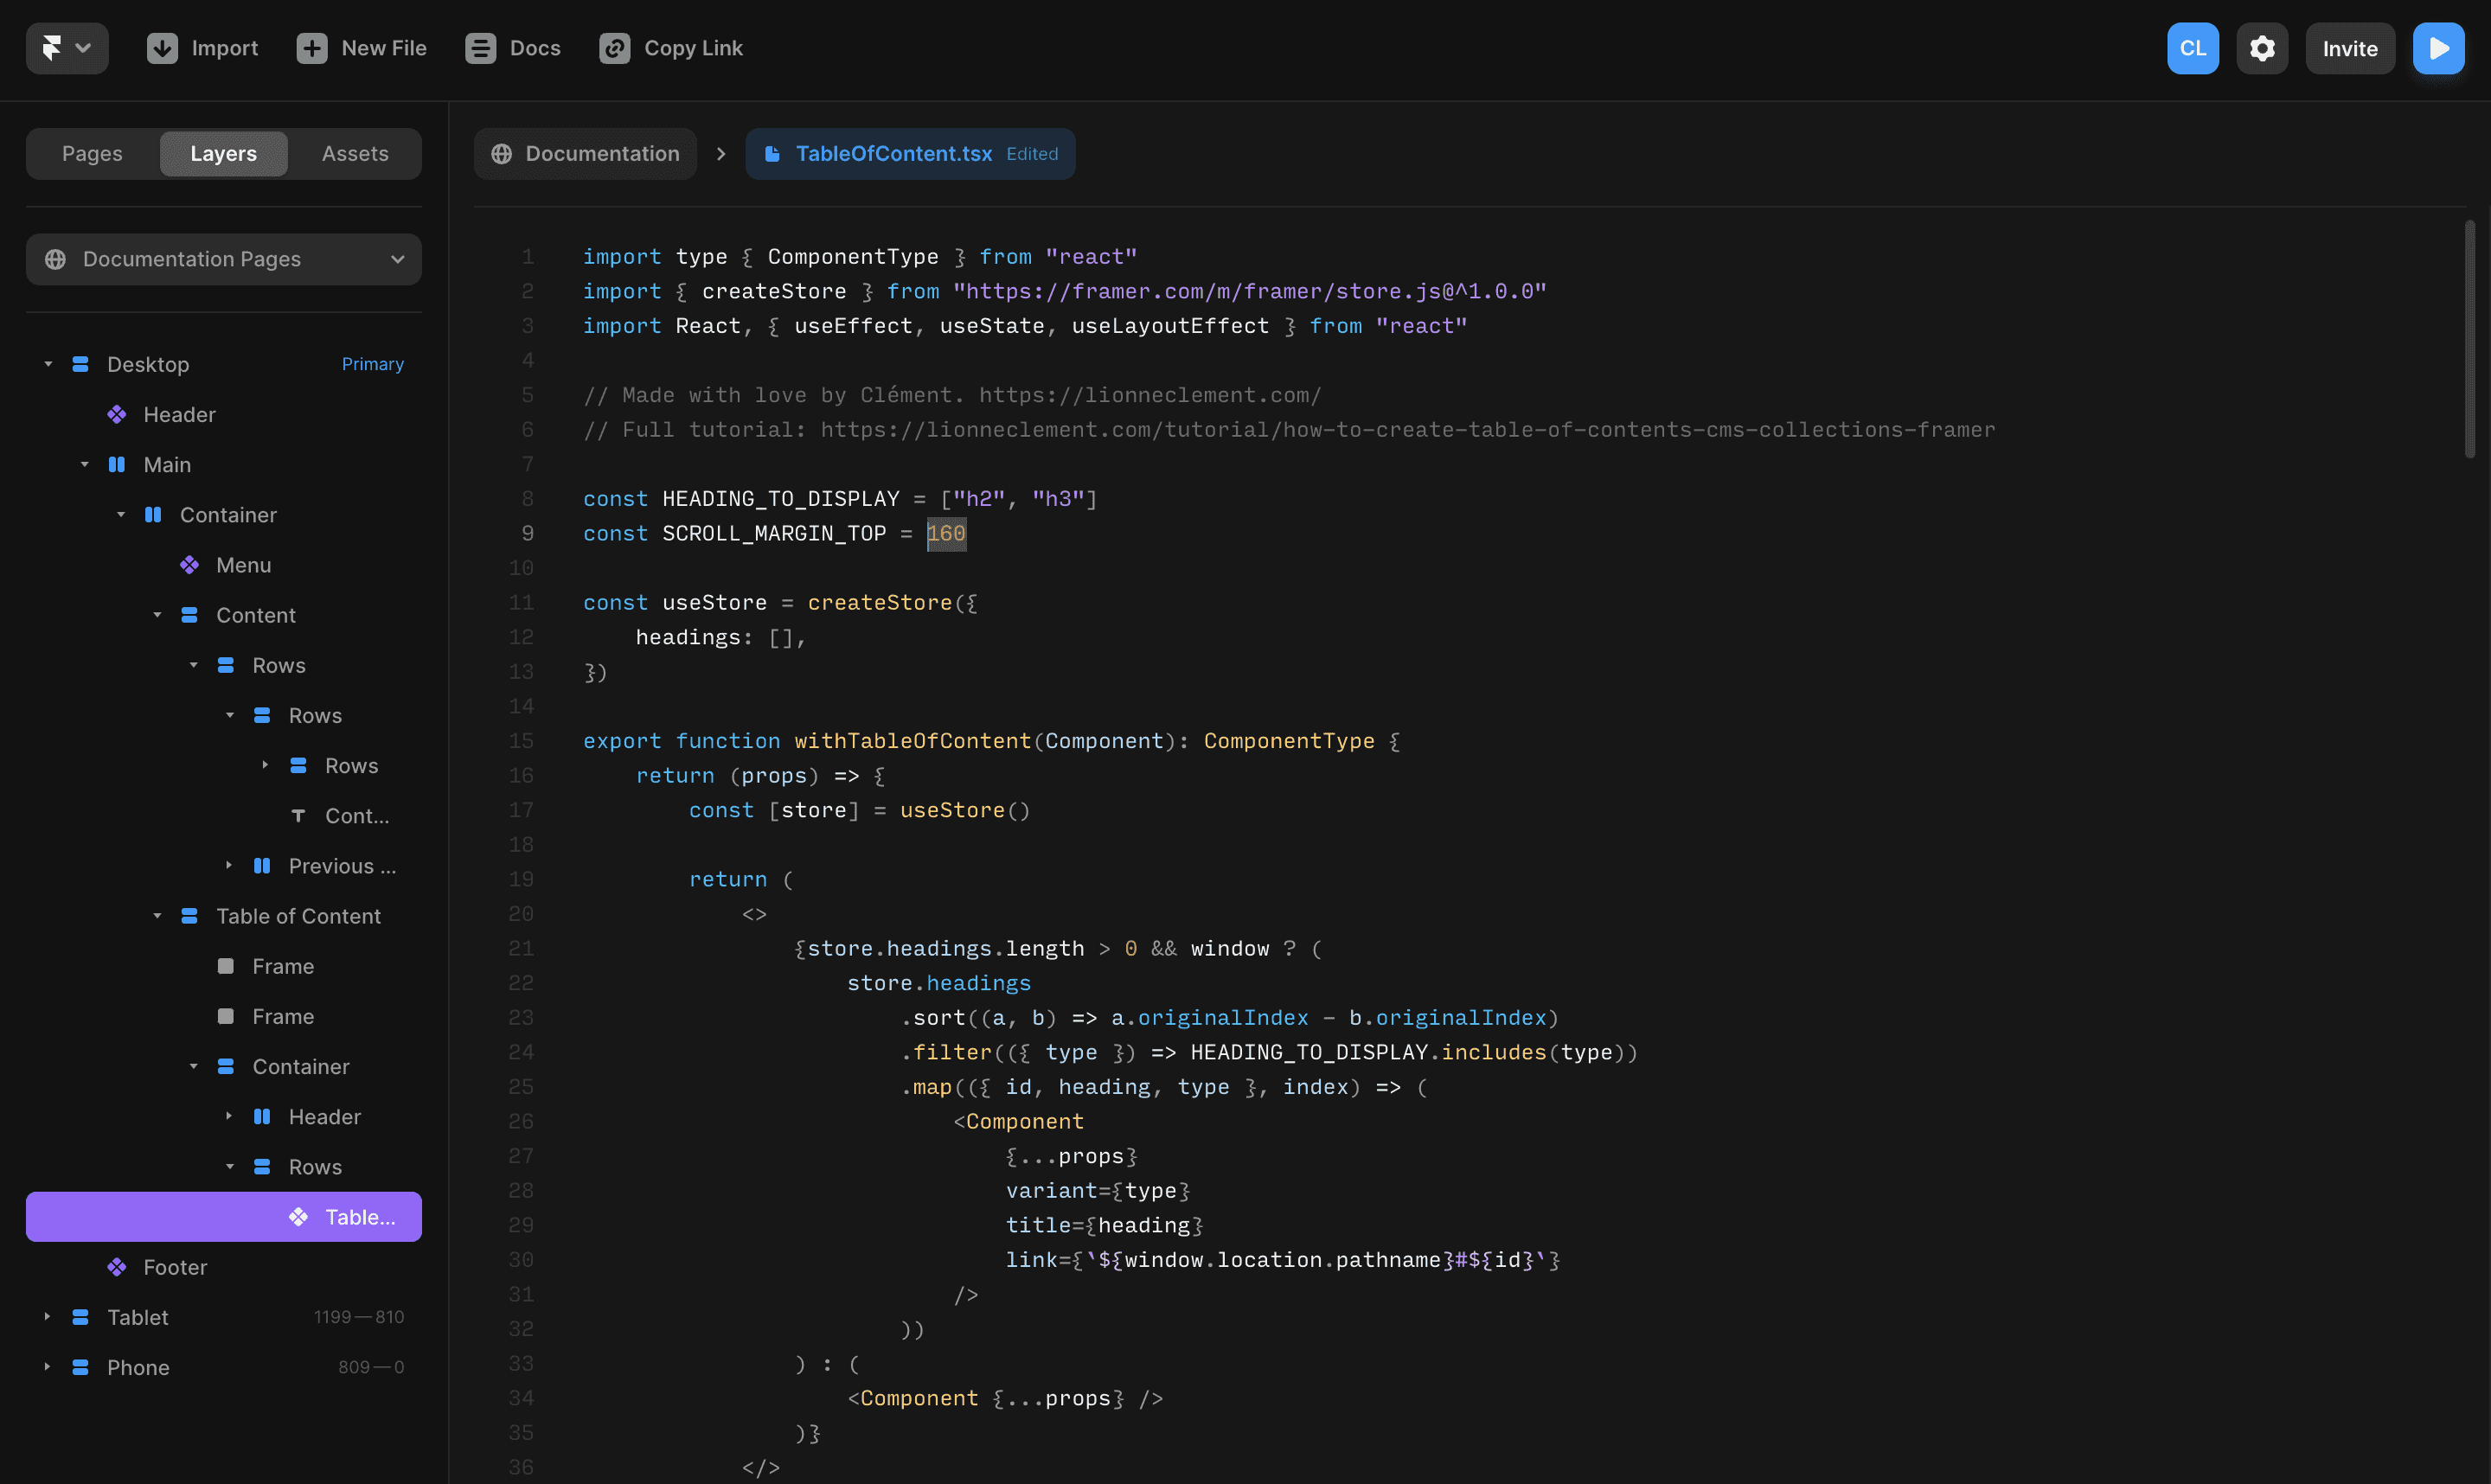
If you want to edit the scroll top offset, you will need to modify the SCROLL_MARGIN_TOP variable. By default, it's set to const SCROLL_MARGIN_TOP = 160.
Congratulations! You've successfully created a custom table of contents for your CMS collections in Framer.
If you have any questions, don't hesitate to reach out for support.
Don't forget to share this post!


